Monday, February 20, 2012

Sewn Paper Garland & Ornaments

I was cruising around craft sites one day and I ran across something that I had never seen or ever imagined to be possible before...sewing paper on a sewing machine.  Of course I had to give it a shot and see if it was really possible.  Low and behold, it worked.  I had a lot of fun experimenting with it and ended up making a very simple garland and dangling ornaments. 

Here is my sheet music garland.

Here is the sheet music dangling ornament.

Being a musician, I typically always test the things out of printed music.  I had my trusty vintage hymnal close by when I began this project.  You can make these out of any type of paper you wish.  Be creative with your paper selection and make something to use for a birthday, baby or bridal shower, of course Christmas and any other holiday.  As you can well imagine, you can do much more intricate things with these sewn paper garlands and ornaments.  I stuck with the basics for this but will definately be trying some variations in the future.

Supplies
Paper of choice
Scissors
Pen
Circle pattern (I just used two different sized lids off of spice bottles)
Sewing machine & thread
Hole punch (if making ornaments

Instructions for Garland
  • Cut circles from your paper.  I chose to cut two different sizes for some added interest.

  • Begin by having an ample length of thread pulled from both the spool on top and the bobbin.  This will give you something to grab and pull your garland through the machine while sewing. 
  • Run one piece of paper through your sewing machine at a time.  You can either choose to sew the pieces end to end (pieces touching) or leave a random sized space in between each piece. 
    • To add space between pieces simply sew through one piece completely.  When you get to the end of the piece, continue pressing the pedal on your machine while pulling the sewn portion of your garland through.  This will cause the thread to twist together.  When the desired amount of space is achieved, slide another piece of paper under the presser foot and continue on.


Showing the process of pulling the piece through to add a gap.
  • When you have reached the desired length for your garland, run the machine a little further (without adding any paper pieces) to give you thread to hang your piece from.  Both ends can be trimmed back after you decide where and how you will hang your garland.
Instructions For Ornaments
  • Follow the same basic sewing instructions as above with the following changes.
  • Select your starting (top) paper piece and put a whole in the top using a paper punch.  this will provide a place to hang using either ribbon or an ornament hook.
  • Begin sewing right under the punched hole on your first piece.  Continue sewing pieces together as instructed above until you have reached your desired ornament length. 
  • Trim threads from the top and bottom.  Your ornament is ready to hang.

Saturday, February 4, 2012

Christmas 2011 - Country White & Blue

My stairway is decorated year round with a few reclaimed pieces from my family.  For Christmas this year I decided to deck the pieces out in light blue (which is a first for me).  I paired it with white and silver and really like how it turned out. Every decoration in this space was from 75% or more clearance after Christmas 2010.  The ornaments and all trimmings came from about three different stores (mostly Walmart and Kmart).  I love doing something brand new but super cheap.


Salty Ornaments

I can't say enough about much how I love using the plain glass ornaments to make things myself.  These salted ornaments are really cool and super easy to make.  It's s very cheap project with great results.  This would be a good project to include with kids.  I will definetely be playing with some variations on this technique in the future...I'm thinking pastel colored cookie sugars for spring ornaments.


Supplies
Glass ornament
Epsom salt
Glue stick
Bowl
Tape (optional)


Instructions

Let me first explain the optional tape.  I am a stickler for having anything handmade still look nice and presentable.  That being said, I used the tape to divide off nice even spaces with straight lines.  I have seen this technique used freehanded which results in a less precise finish.  It all depends on the look you are wanting to achieve.
  • Apply tape along your ornament as a guide to where you would like your salting technique to end.  You may choose to tape in different patterns and/or formations.  I simply divided the ornament in half.
    • If you chose to freehand your design, simply skip to the next step and apply the glue straight on to any part of the surface you would like salted.
  • Coat the entire portion of the ornament that you wish to salt with glue using a glue stick.  Be sure that you've evenly coated the area to ensure that salt will stick.
  • Dip the glued portion into the epsom salt.  I poured the salt into a bowl and simply rolled it in the pile.


  • Gently remove the tape (unless you chose to do the freehand method) and hand the ornament to dry.

Here is a shot with the flash on so you get a better look at the salt and glue after it's dried onto the ornament.  It really looks neat.

    Thursday, January 26, 2012

    If You Can Spell...

    I absolutely love the use of letters in decor.  I have an additcion to letters which is evident by my initials all over my house in every font, size and color.  I think it's a really fun way to incorporate something personal into your space.  If you look in just the right places you can find letters everywhere.  I love digging through the bins at places like Michaels to find letter items to give to friends (and of course for myself...since I can't ever seem to have enough around the house.  LOL).

    If you know how to spell and find a bin of random letters then think Christmas.  Here is what goes through my mind when I find that amazing bin of letter cut outs...

    I'm looking for...
       D, A or S for myself
       K for Kylie, L for Leah, R for Ryan...and so on.

    But then I start thinking...
       JOY, NOEL, HO HO HO, MERRY, ...get it???

    Anything you find can easily be painted with spray paint or basic acrylic paints.  Here are some of the things I've found recently.

    These letters were $1 a piece from Michael's.  They already have a nice finish and have hangers already installed on the back.  These would make perfect tie-ons for a gift.  I will likely string these together on a piece of ribbon using the hangers on the back and then swag them or hang in the center of a large wreath.


    I got these foam letters in a clearance bin at Barnes & Noble.  I think all four of them cost me about $6.  I will give these a matching coat of paint and use them on a shelf or worked into a centerpiece.

    Tuesday, January 17, 2012

    Another "Fill 'Em Up" Ornament...Pipe Cleaners

    Wow!  The new year has gotten away from me and I'm a little behind.  Here are the newest ornaments I've made.

    I'm always excited to find new ways to make ornaments from the plain glass ornaments you can purchase at the craft store.  These are super easy using basic pipe cleaners.  They can be done in an endless number of colors and styles.  I used the basic round ball ornaments but you can find other pretty cool shapes to work with.  These could be fun to do with kids.  Let them be creative with the pipe cleaners.


    I apologize in advance for the picture quality.  These ornaments are hard to get good shots of.

    Supplies
    Clear glass ornaments
    Pipe cleaners
    Hot glue gun & glue
    Pencil
    Scissors


    Instructions
    • Pull the hanger/cap off of the ornament.  You'll be glueing the pipe cleaner to the inside of the cap.
    • Decide what you'd like to do with your pipe cleaner.  I did mine two different ways.  I wrapped one around a pencil and made a simple curl out of it.  The other I bent and twisted to make it look like a tree branch.  You can easily manipulate them into an form you'd like. 
    • Wrap a tight coil at the top of your piece where you plan to attach it to the cap.  this will give you a good place to secure the piece to the glue. 
    • Remember that you must be able to get it through the opening of the ornament.  Simply clip any excess pipe cleaner with your scissors.

    The "ball" at the top is my "coil" to attach the piece securely to the cap.
    • Take the cap and put a dot of hot glue on the center of the inside.  Be sure to use enough glue to sufficiently hold your pipe cleaner.  Be very careful not to get the glue too close to the outside edges of the cap.  This will keep the cap from sitting correctly back on top of the ornament.

    • Once your glue is in place, quickly adhear your pipe cleaner to the cap.


    • Once your pipe cleaner has had time to dry and attach to the cap, carefully place the cap back onto the ornament...inserting the pipe cleaner first. 


    • I did go one step further on a few of the ornaments and places a ring around the cap using coordinating colored pipe cleaner (shown in the pics at the top).  I simply glued it on with the glue gun as well.

    Friday, December 30, 2011

    It's The Most Wonderful Time...To Be Buying For Next Year

    Wow...Talk about a busy Christmas.  I'm behind on blogging but back just in time to remind you that this is the best time EVER to be out searching for great buys on next year's holiday decor items.  This is the exact time that I begin digging through the messy piles of leftover Christmas decor on the shelves.  You can get amazing buys on things at 50% off or more.  I rarely ever pay full price for anything that I use to decorate.  Often times I start planning next year's color schemes based on new pieces I find on Christmas clearance.  I found some cool new ornaments at a very unexpected store...I'll share them with you below.

    I buy very little when it's only 50% off because I'd like a better bargain than that.  Waiting for the discount to be higher usually means that the selection has been picked over BUT that's when you find some of them more random/not so traditional items/colors left on the shelf.  This is the perfect time to buy something new and different that you normally wouldn't ever think to buy.  People often don't ever think outside the box when decorating.  Step out and try something new.  You'll find lots of great things to use as a starting point because everyone leaves the more unique items behind.

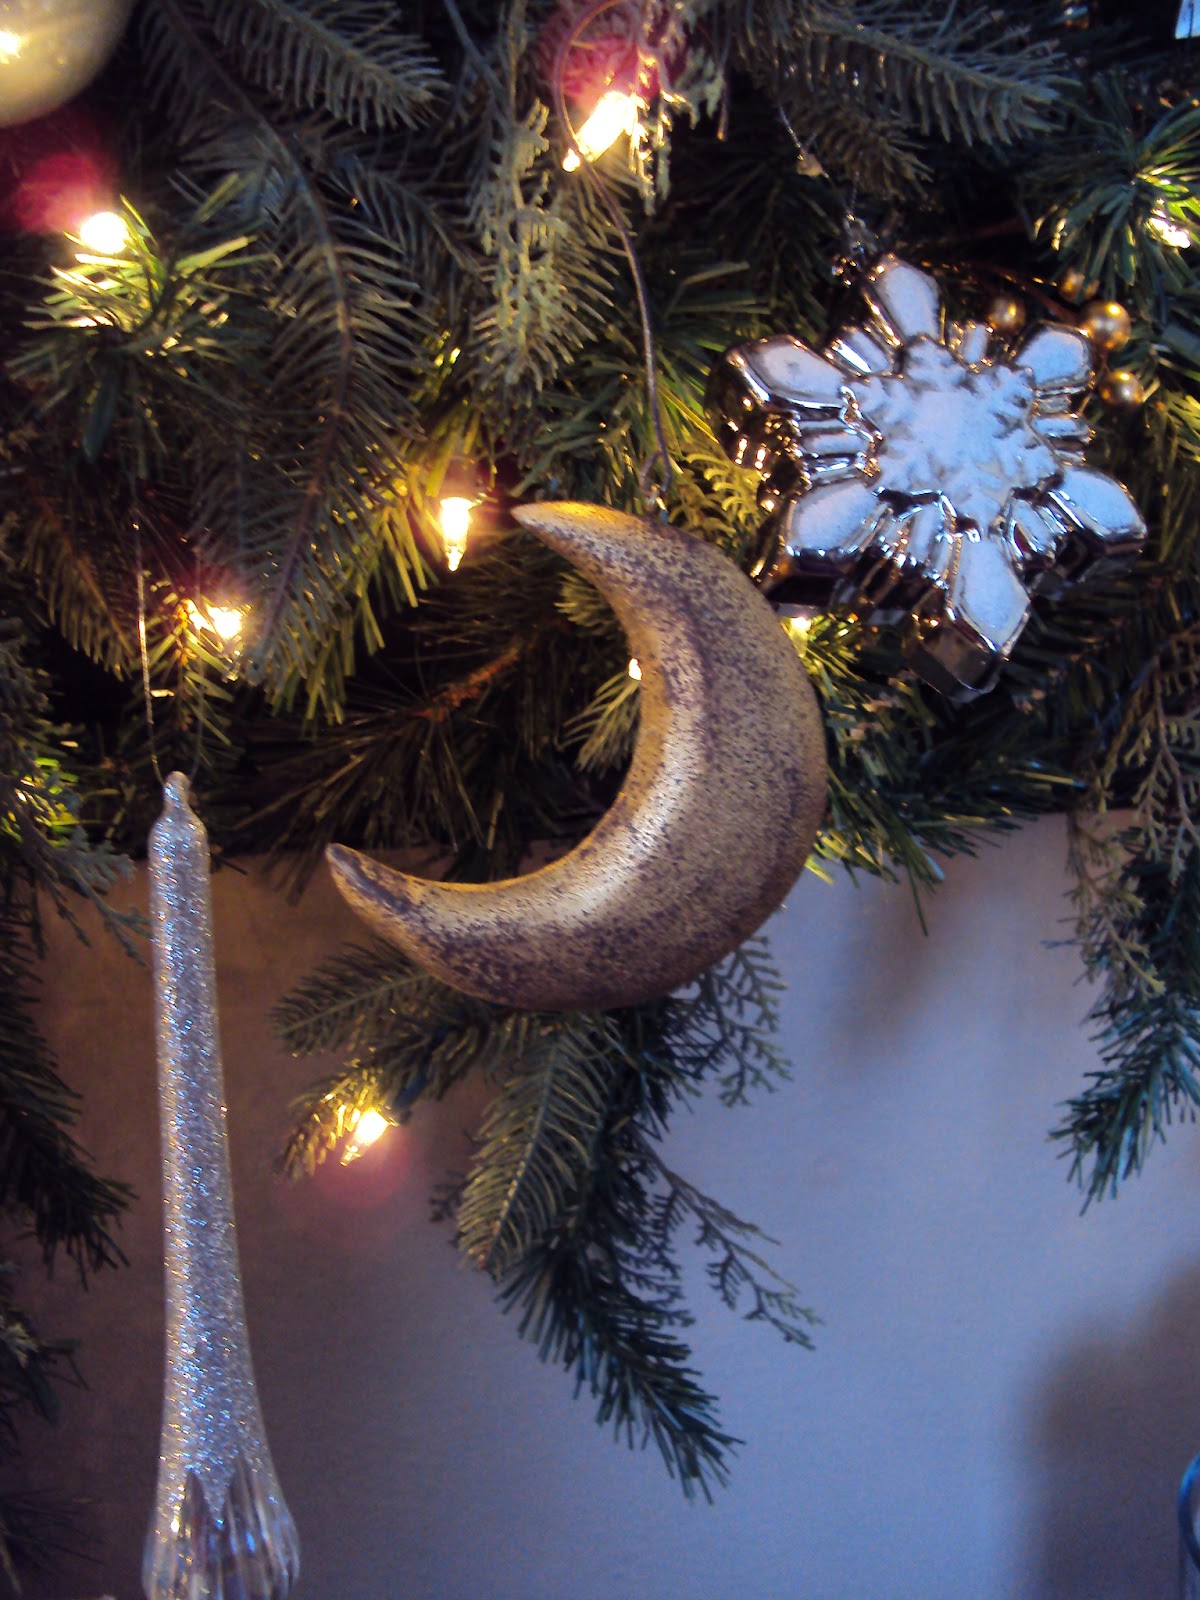
    Here's a perfect example of a great find.  A friend invited me to join her on a trip to an outlet mall.  She was on a mission to find a new coat so I went along for the ride.  We passed by the storefront of Coldwater Creek.  This store is primarily a more upscale clothing store for women.  We hopped in, hoping she would find a coat.  I wasn't aware that they sold much more than clothing but was surprised to find a small shelf that had 50% off Christmas items.  Hanging right on the display was a grouping of really cool gold moon and sun ornaments.  At half off they were about $1.25 a piece.  It was a deal that I couldn't pass up.  I usually buy ornament in groups of 3's or 5's but in this case I bought all they had on the shelf.


    I'm never in a hurry to take down Christmas each year and I'll often come home after finding some great new clearance ornaments and put a few up them up.  One of these moons made it up onto the mantel to enjoy a little time as part of Christmas 2011...LOL 


    If you're looking for something new to add to your decor for next year then hurry out and start shopping.  I got some great deals while out yesterday.  Check your local Kohl's...mine had Christmas 75% off yesterday. 

    Happy shopping!

    Wednesday, December 21, 2011

    Christmas 2011 - Jewel Tone Bathroom

    I knew what my plans were for the bathroom way back in January.  I purchased everything that I used in there on clearance from KMart after Christmas last year.  It was all a part of the Jaqueline Smith line, in colors of gold, hot pink, rose, plum and purple.  I purchased quite a bit of what was on the shelf but only used about half of it on this tree.  I would guess that what you see in these pics costs about $15-20.  Why was all of this great stuff still on the shelf at 80-90% off?  Because most people can't imagine how they would use such color combinations.

    This tree was purchased over ten years ago from Dollar General for about $20.


    I made the swag over the window (which also hides the cords to the lights) by twisting together left over branches from the tree.

    Don't forget to save ornaments while decorating the tree so you can also decorate around the rest of the room.

    Here is a matching garland that I purchased with the rest of the set.  I took wire cutters and cut of small sections and used them as picks in the tree and garland.  I also purchased a matching wreath that I'll use some other year when I use these colors in a larger room.